Lemon curd and lemon and blueberry muffins

A little while ago, I had a hankering for muffins. I wanted something fruity and zesty and went in search of an appropriate recipe. It wasn’t long before I found a delicious recipe for lemon and blueberry muffins, but there was a tiny problem: I didn’t have the required lemon curd.


Of course a problem like that is never truly a problem when you have ingredients and recipes, so the search went on to lemon curd. Well, I found a wonderful recipe that didn’t seem too difficult (I had never made lemon curd before, so I wasn’t entirely certain I could succeed at making it myself). All the ingredients were already in my home, so I quickly got started.


Because both recipes are to be found online and in English, I’ll simply put up links to them. The recipe for the here and the recipe for the lemon and blueberry muffins is here.


I started with the lemon curd recipe, because I figured it would need some time to cool before I could actually use it in the other recipe.The instructions were fairly simple and were absolutely right. I just got a little bit impatient at one point and turned the heat a little higher. In hindside, that was a mistake. While the lemon curd tasted absolutely wonderful and had a great consistency, a very small part of the egg whites cooked too quickly, so there were some small white flecks in the curd. They didn’t bother me, because the flecks were only very small and there weren’t very many, but I’d prefer it if they weren’t there of course.


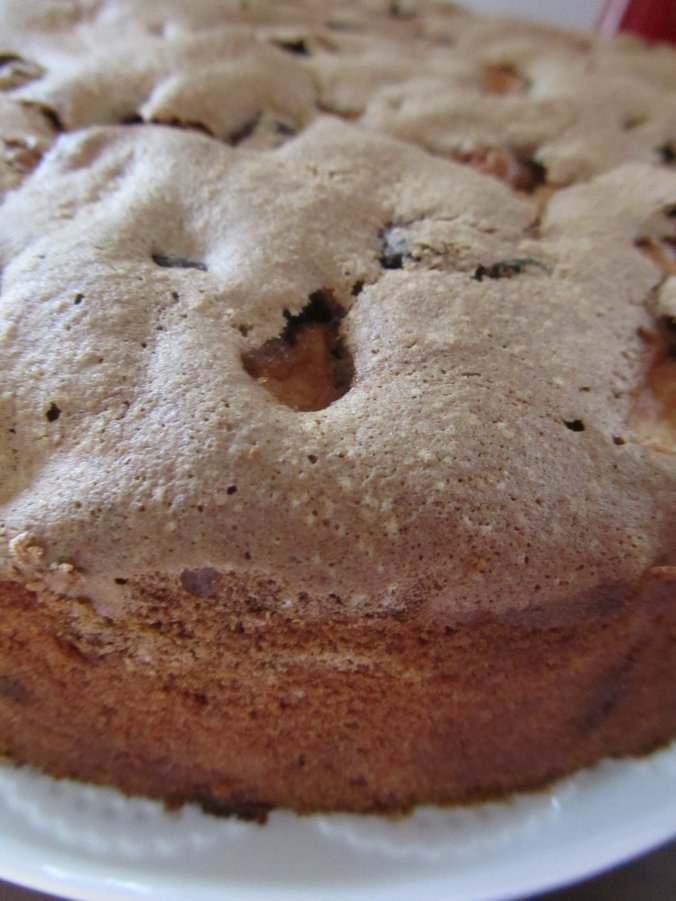
The verdict for the lemon curd is: I’m DEFINITELY making this again, and apart from keeping the heat a little lower, not becoming so impatient, and maybe not adding the lemon zest (I used my finest zester, but the peel ended up in little strings and they would stay behind in my moouth, which I don’t like) I wouldn’t change a thing. The curd was very tart, very lemony, and absolutely delicious! I did have a picture of the curd, but somehow, that picture looks unappetizing. I must put that down to my “skills” in photography, because in real life it looked amazing and tasted even better. I’ll show it here because I’m all about the good as well as the bad, but please keep in mind that reality was so much better than this one not so great picture.

IMG_4090

My ugly picture of utterly fantastic lemon curd

You can’t say I didn’t warn you…

Anyway, on to the next bit!

Once the lemon curd had been made, I started on the muffins. I’m not sure if you know the Hairy Bikers, but my husband and I like to watch their shows. They’re funny, they love their food and they have no fear of the good things in life. Yes, I’m talking about fat and sugar.


Again, the instructions were fairly simple, but in hindsight I was glad that I ended up with more than I could get into the oven in one go. The first batch, I did everything exactly as it was said in the recipe, but because the sugar on top of the lemon curd started to burn, the first batch came out looking rather dark. Those muffins also had a few edges that tastd a little….burnt.

Img_4097

The first batch is at the back, the second batch is at the front in this picture.


So, for the second batch, I decided to just skip the sprinkling of sugar that the Bikers recommend, and those muffins actually turned out amazing! The muffins came out very soft and they smelled absolutely fantastic. The lemon curd on the top gave them that extra zing and also helped the muffins stay moist. If I had to say one negative thing about these muffins (which in my opinion really isn’t a negative at all, but some people might nont like it) it would have to be that they ended up a little bit sticky.


All in all, I would love to make these lemon and blueberry muffins again, but now I know that I prefer them without the sugar on top of the curd.


What are your favourite muffin-recipes? Please let me know in the comments and who knows, they might feature in a future post!


Caramel and sea salt cookie dough bonbons

For this blog post, I have a bit of a story to write before I get to the actual recipe part. You see, today’s recipe came to me in a rather special way. Let me tell you what happened (you may want to get some tea, this might become a lengthy post).


Last january, my husband started to become very secretive. He’d taken a notepad and at the bottom had written “KEEP OFF!”. I’d never see him write in it, but everytime I saw the pad, it would have the message at the top. He also started spending rather a lot of time working with his laptop, heaving sighs and giving the screen some looks of disgust. When I asked him what was going on, he just mumbled something unintelligible and would continue his working and sighing. Every time I tried to take a peek, he would tell me to get to the other side of the table or the other side of the room, so I had no idea what he was working on.


Finally, in March, he told me he was working on a surprise for my birthday. He was getting a “little bit stressed out” (read: A LOT stressed out) about it, but he was determined to get it all done. He just wasn’t sure if he would be able to get it all done in time for my birthday. I told him it didn’t matter, that it was fine if it was a bit later, and that surely I would like whatever it was what he was working on and it would well be worth the wait.


My birthday came and went and even though he did give me some gifts, he made it clear that the thing he had been working on wasn’t there yet.


Cue about a week after my birthday party. That day, the gift was finally there and I found out what it was that he had been working on for so long. When I saw it, I couldn’t believe my eyes. He had made me a cookbook. Not just that, but he’d made me a cookbook filled with recipes that incorporate my favourite bar of chocolate: Tony’s Chocolonely chocolate in milk chocolate, sea salt and caramel. And to make sure that I would make something from the book, he also gave me seven (yes, SEVEN!) bars of that particular chocolate and some Maldon sea salt for good measure.

18034024_10154516652702467_1015032679825941873_n

He made the lettering himself, changing the letters of the chocolate bar to make the title of the book. He designed every page, spending hours online for stock photos and images and recipes he could use. He went through dozens of recipes, changing words, trying to find the best way of putting everything on a page. And then he had it printed on glossy photopaper, the good quality stuff and made sure even the spine was looking perfect.


I’ll admit it: I am completely in awe of what he did for me. And of course I was going to make something from the book!


So here it is, the first recipe from my own cookbook. It’s a recipe for cookie dough bonbons that are covered with caramel and sea-salt sprinkled milk chocolate. Before I started this post, I did a quick internet search and discovered the recipe is actually Wolferien’s. The link to the original recipe is here. Just so you know: it’s in Dutch.


Here’s the recipe in English (directly translated from my cookbook):

Ingredients:

130 grams of full fat butter

80 grams of icing sugar

100 grams of light brown caster sugar

2 tablespoons of heavy whipping cream

1 teaspoon of vanilla extract

225 grams of plain flour

1 teaspoon of sea salt

2 bars of Tony’s Chocolonely caramel and sea salt chocolate (I used only one because I had soms chocolate chips and wanted to use them up)


Method:

Cream the butter and sugars together. Add vanilla and cream and mix until well combined. Add the flour and sea salt and mix to a crumbly dough. Cut up one bar of chocolate and mix this in (I used chocolate chips instead). Form the dough into a ball.

Line a tin with baking parchment (I used a tin that was 20×18 cm, which is about 8×7 inches) and push the dough into the tin, making sure to get an even layer. Put the tin into the fridge to cool. Melt the other bar of chocolate au bain marie and pour the melted chocolate over the cookie dough. Sprinkle a few sea salt flakes over the top for decoration (I didn’t do that). Put back into the fridge to cool for at least another hour.

Once the chocolate has hardened, use a sharp knife to cut the dough into squares and your bonbons are done!


I completely forgot to take pictures while I was making these bonbons, but I did take pictures of the end result:


The bonbons were really yummy and I loved the contrast between the sweet vanilla cookie dough and the caramelly salty flavour of the chocolate topping. I handed out some of these bonbons to some relatives and everyone loved them.


This brings us to the question: Would I make them again and what would I change?

I don’t think anyone will be remotely surprised when I say that YES, I  WILL be making these again. If I had to change anything I might use a little less sugar in the dough if I felt like having a slightly less sweet bonbon. I might use smaller chocolate chips, because the ones I used were a little bit big for the size of the bonbons. But really, the recipe works perfectly, so any changes are optional and not necessary at all.


If you end up making these bonbons, do send me the result! I love seeing what you make of these recipes and maybe your personal changes will give me some new idea for other recipes. Alternatively, if you have a recipe you’d like me to try, do let me know as well! Please email me at femkesfavouritefoodstuffs@gmail.com or fill out the form on my contact page.


Liesbeth’s gran’s apple cake without butter

Like I promised in my previous post, this recipe is also one that I made for my birthday party. This cake is an absolute staple every year, because everyone I know loves this cake. And the best thing? There’s no butter in there!


My mother got this recipe from her friend Liesbeth, who sent it to her as “grandmother’s apple cake”. Now I’m not sure if the recipe was really Liesbeth’s gran’s, but I like the story, so I’m sticking with it.


The recipe is fairly simple:

Ingredients:

4 eggs

250 grams of granulated sugar

1 sachet of vanilla sugar

250 grams of self-raising flour

4 large apples (I used the Dutch favourite, goudreinet, but any cooking apple that goes soft but not pulpy will do)

100 grams of raisins and sultanas

cinnamon and granulated sugar for the top

Spring form with a 24 cm diameter (the standard size in the Netherlands)

Method:

Preheat the oven at 175 degrees C.

Beat the eggs, granulated sugar and vanilla sugar until it’s an airy creamy texture.

Sift in the flour and mix it through.

Peel the apples and cut them into small bits, add them to the mixture.

Add raisins or sultanas

Grease the spring form and dust with flour

Put the batter into the spring form and sprinkle cinnamon and sugar on the top.

Gently push the cinnamon and sugar into the batter with the back of a metal spoon.

Cook for approximately 1 hour.

Check if the cake is ready to be taken out of the over. Once it’s ready, take the cake out of the oven, cut around the edge.

Let cool for 5 mins and then remove the cake from the spring form.


When you’ve done all that, you end up with something that looks a bit like this:

Img_4074

Now, I’ll be the first to admit that over the years that I’ve been making this cake, I’ve made a few changes.


The first change is that I start by cutting the apples and once they’re all cut, I add the sultanas (I only ever use sultanas and I use as many as I like. I just gage it by eye). Then, I take a heaped tablespoon of cinnamon and add that to the apple mixture and give the bowl a good shake for a minute or so until all the apple and sultana bits are coated in it. When I add this to the cake mixture, the cinnamon gets spread out throughout the cake batter and that means that it’s going to be extra yummy.


Quite often, I will forget to dust the tin with flour. Please, if you learn anything form me, learn that this is NOT a good idea. The cake will stick to the sides something awful and it will end up looking like a battlefield instead of a cake. So please,  do better than I do.


Lastly, I don’t always put the cinnamon and sugar on the top. the reason for this is that quite often, it simply falls off again when I cut the cake. Another thing that sometimes happens is that the sugar burns and makes the top taste bitter. That is the reason I often don’t bother with it, and just put the cinnamon and sugar inside the batter and not on the top.


Having said that, the reason I;ve made this cake so often is because the end result is the moistest, softest apple cake you can imagine. It is so magnificent that no matter how often I make it, it is always gone by the end of the afternoon. So get going and make one yourself, and please, let me know the results!